ADVANCED ULTRASONIC APPLICATIONS
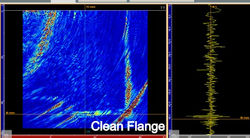
In-service Flange Face Corrosion Assessment
-
Use of highly focused PAUT and PWI/TFM allows corrosion/erosion damage to be quantified while equipment is online.
-
Flange ID bore and sealing face assessment is performed without the need to break flanges, removing potential for hazardous exposure.
-
Cost effective online evaluation allows for more informed planning, resulting in reduced shutdown work scope.
 |  |
|---|---|
 |  |
Bolt, Pin, Stud and Shaft Inspection
-
Use of highly focused, large aperture PAUT and PWI Imaging allows for detection and accurate sizing of cracks in initiation stages to full component fractures.
-
Threads are clearly imaged, and any damage is quickly assessed and measured in-service.
-
Fully encoded results allowing for remote analysis and trending as required.
 |  |
|---|---|
 |  |
 |
Weld Inspection - Nozzle to Component (Cat D)
-
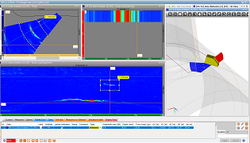
Utilizing a 3-axis encoder the nozzle geometry is built withing the system a 3D overlay is created and updates to the changing bevel real-time as the transducer travels around the nozzle recording the weld data. This overlay allows the operator to understand where his sound is at all times, greatly improving analysis and reporting times.
-
The data is displayed a cross-sectional view superimposed on the nozzle geometry greatly improves differentiation between defect and geometrical indications.
-
Highly accurate defect locating and sizing
 |  |
|---|---|
 |
Weld Inspection - Small and Large Diameter in-field and Fabrication Welding
Advantages:
-
Better data quality that can be captured/stored reviewed at a later date or kept for inspection records
-
PAUT/TOFD in lieu of traditional radiography testing. No more radiation exclusion zones, off shift hours or risk of radiation safety incidents.
-
Higher sizing accuracy for critical defects eliminating over-sizing and reducing weld repairs.
-
Multiple TFM techniques available offering 3D imaging for easy result interpretation.
 |  |
|---|---|
 |
High-Resolution Corrosion Scanning & Crack Detection
-
Ability to map large areas with high speed high resolution data
-
Accurately detecting and evaluating corrosion depth, length and location.
-
Encoded Data is collected, stored and be exported for further remote analysis and/or auditing.
-
Capturing encoded data is an excellent way for operators to monitor areas of concern and plan for future maintenance
Using various applications of PAUT/TFM/PWI and ECA our crack detecting and characterizing capabilities are beyond superior. We have the solution you need to detect and monitor critical defects such as:
-
High temperature hydrogen attack (HTHA)
-
Stress Corrosion Cracking (SCC)
-
Hydrogen Induced Cracking (HIC)
-
Stress Oriented Hydrogen Induced Cracking (SOHIC)
 |  |
|---|---|
 |  |

